Overview Checklist:
- [ ] Machine Positioning: In the fully stored position with all 4 net poles down and all 4 wheels locked into the pallet caster cups. Machine body is rotated counterclockwise until resistance is met.
- [ ] Frame Secured: Secured tightly to the pallet using the provided heavy-duty zip ties.
- [ ] Components Secured: Shot counter, tablet (wrapped/rotated), and away-from-basket ramp attached with zip ties where applicable.
- [ ] Photos Taken: Images captured showing the wheels in cups, frame secured to the pallet, and the shot counter secured.
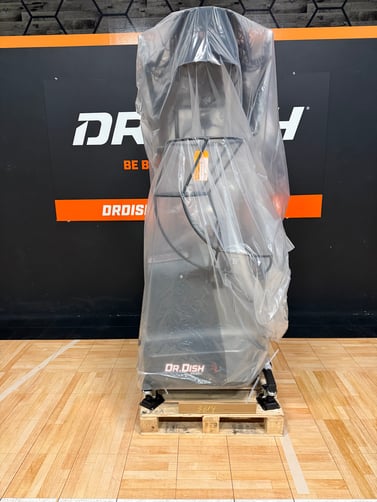
- [ ] Boxed & Ready: Completely covered with the cardboard box or tarp.
- [ ] Support Notified: Photos emailed to service@airborneathletics to receive your BOL paperwork and schedule pickup. Please also include the best days of the week for a pickup to occur along with the latest time you will be available at the pickup location.
- 🚨If photos are not submitted the pickup cannot be scheduled🚨
- Once Photos are submitted our logistics team will work to schedule the pickup of your trade-in. If further information is required you will be contacted.
Current Models (Arc1, CT+, All-Star+, Rebel+, and Home) - Video Instructions
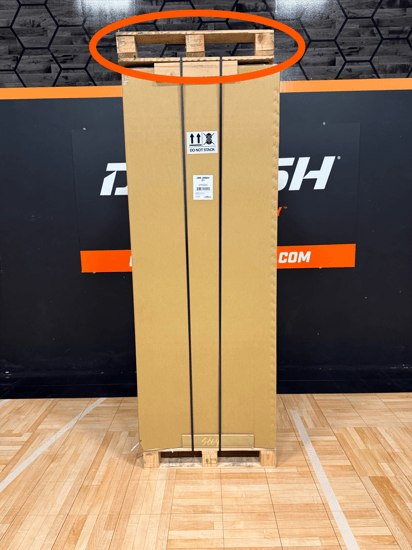
🚨Important Note: The pallet, cardboard cover, and plastic wrap from your new machine needs to be saved and used for packaging up your old machine. The machine must be returned on a pallet to avoid charges.
⚠️Please note: If you are trading in a Dr. Dish Pro, Rebel, or All-Star model. There are photos specific to these models showing the zip-tie locations further down in the article.
Written instructions for preparing your machine for shipping
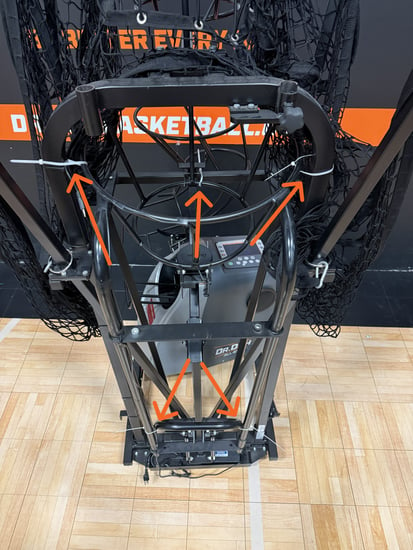
- Ensure your machine is in the stored position as seen in the video with all 4 net poles down.
- Lift the machine on to the pallet, ensuring all 4 wheels land in the caster cups. Lock the 2 front wheels.
- If the pallet is not labeled front and back, you can determine this by noting the difference in distance between the two sets of caster cups. The front is a bit further apart than the back.
- If the pallet is not labeled front and back, you can determine this by noting the difference in distance between the two sets of caster cups. The front is a bit further apart than the back.
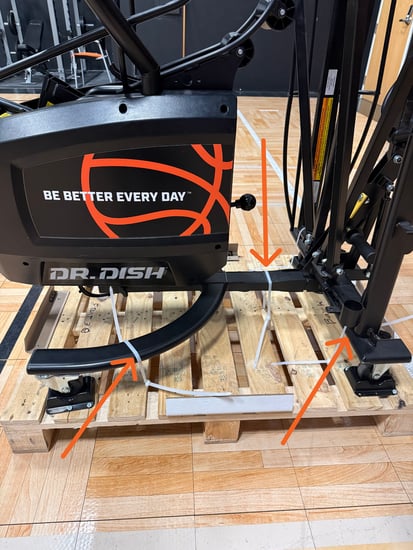
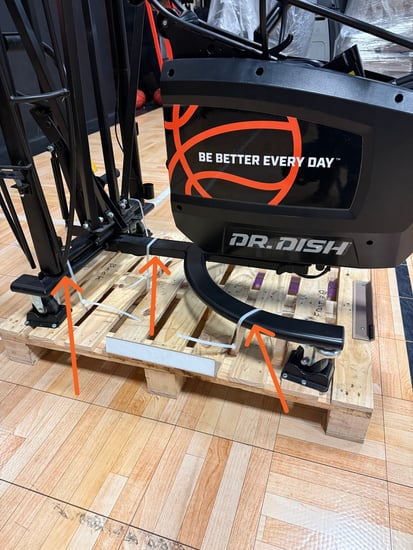
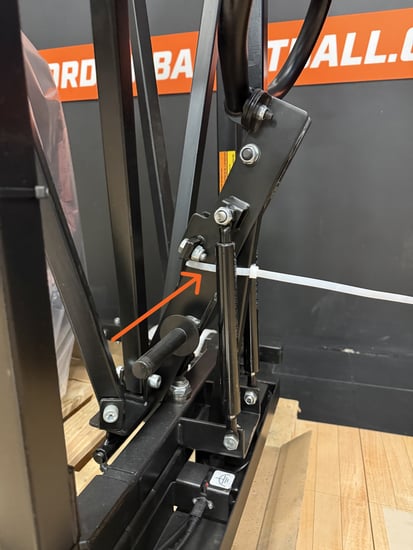
- Use the heavy-duty zip ties to secure the machine to the frame.
- Follow along with the video to zip tie the exact locations seen in the video from (3:05-5:00)
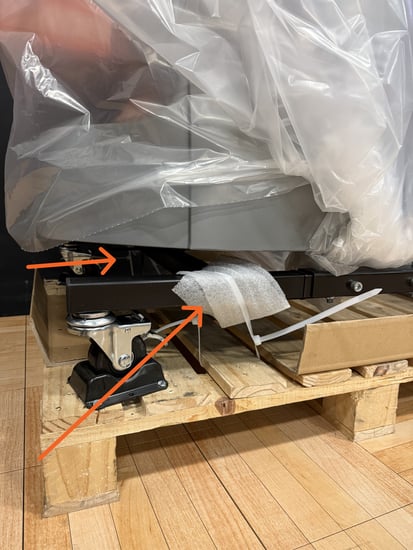
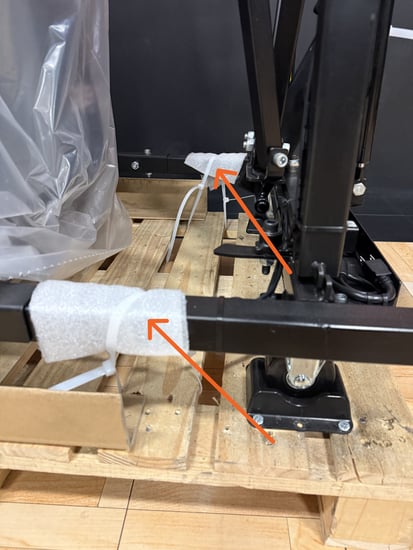
- If your machine has a tablet, wrap the front screen with the provided foam and small roll of plastic wrap.
- Secure your shot counter on the rear of the machine with the smaller zip ties as shown in the images below.
- If you are packing an Arc1, CT+ or CT model. Secure the away from basket ramp with a zip tie to it's storage place on the rear frame of the machine.
- Please take pictures showing your machine is packed correctly. The pictures should show the following, example pictures are below:
- Your machine's wheels are in the caster cups.
- The frame is secured to the pallet with the heavy-duty zip ties we sent.
- The Shot Counter secured to the machine's rear frame.
- Next, rotate your machine so it is facing the right baseline.
- If your machine has a tablet rotate it so it is facing toward the back support poles.
- Place the box from the new machine over the returning machine. Tilting the box so its angled slightly toward the back of the machine can help with sliding the box past the net poles.
- Please let us know when the trade return is packed up and ready for pickup to be arranged. Once we receive the images of the machine secured to the pallet we will send over the return BOL (paperwork) and schedule the pickup. Please also include the best days of the week for a pickup to occur along with the latest time you will be available at the pickup location. This information can be sent as a reply to the email containing the trade in instructions that you received or directly to service@airborneathletics.com.
- 🚨If photos are not submitted the pickup cannot be scheduled🚨
Dr Dish Pro, Rebel, and All-Star Models:
If you are trading in one of these older models the process is generally the same as what is written above and shown in the video guide. The main differences will be the exact spots that you Zip-Tie the machine to the pallet. Example images are provided below.
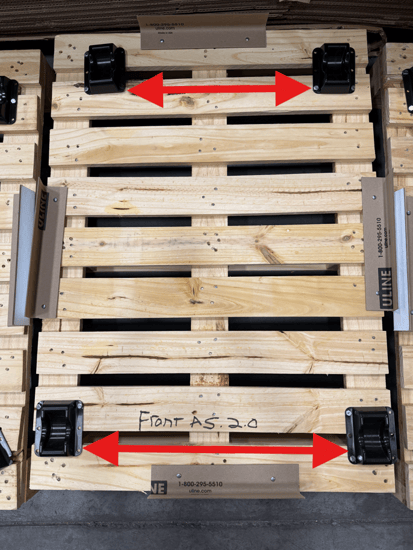
- Front Zip-Tie Locations:
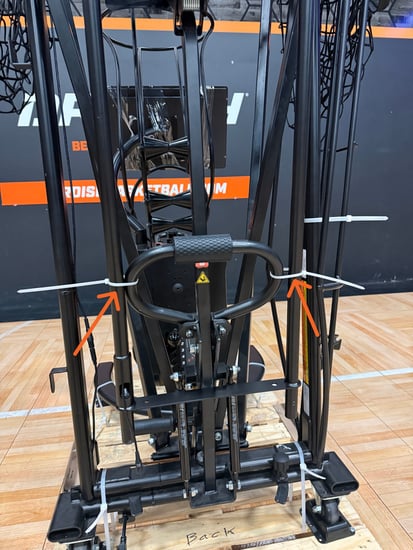
- Rear Zip-Tie Locations:
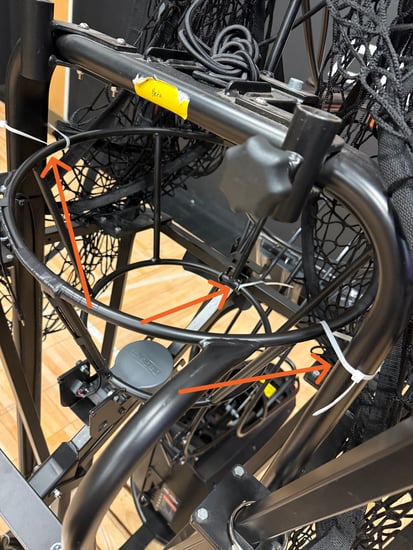
- Rear Net Handle Zip-Tie Location:
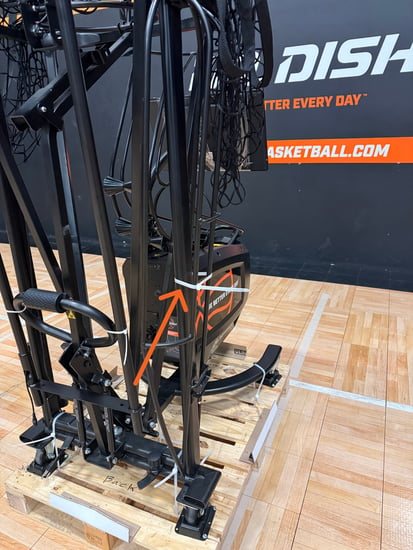
- Shot Counter Zip-Tie Locations:
- Machine Position on Pallet: It is important to ensure that the body of the machine is oriented so that the Lower Feeder is facing the front of the pallet as seen in the photo below, prior to covering with the box or tarp.
Trade in Returns:
- If a pallet is delivered on top of your new Dr. Dish machine, then it is the correct pallet to use for packing your trade-in unit, as shown below.
- If the compatible pallet for your returning machine ships separately you will be emailed tracking information for that as well.
Trading in a Dr. Dish Original Machine:
A UPS box with label & return instructions will be included in your Dr. Dish order. Please follow the instructions to remove your console from your (old) Dr. Dish Original, and drop it off with UPS. This will validate your trade-in discount. Please return within 5 days of receipt.

Trading in Competitor Models:
Please print the shipping document emailed to you, and include with your trade-in. Have your trade-in ready at the delivery location when the carrier arrives with your new Dr. Dish. In the event that the Trade-In is not picked up, please reach out and we will make further arrangements.