Required Tools
- 4mm hex wrench
- 10mm wrench
- Recommended: A second person to assist
Part 1: Preparing and Removing the Net
-
Unplug the machine from its power source and lock the front wheels to prevent any movement.
-
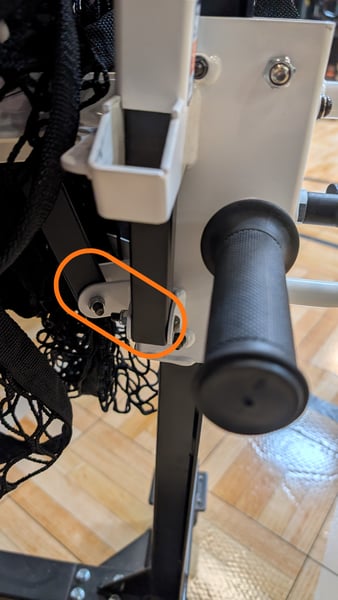
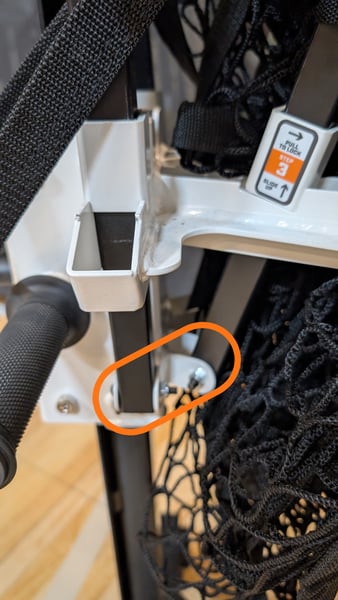
Remove the Net Poles: Working one net pole at a time, remove the nut and bolt securing the base of the pole.
-
Crucial Note: Do not disconnect the net from the poles. You are only separating the poles from the machine's net slider.
-
- Set Poles Aside: Lift the net pole out of its socket. The attached net will help hold the pole up; you can rest the pole(s) gently on the side of the machine.
Part 2: Removing the Shot Counter Head
-
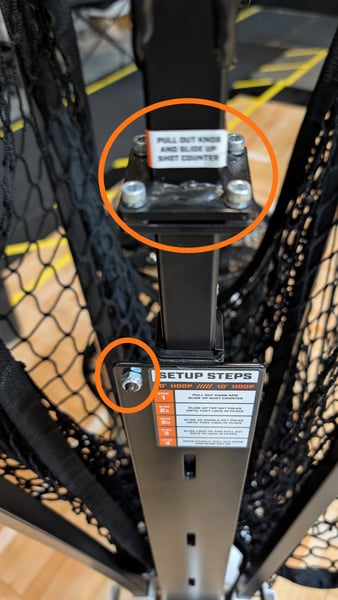
Remove Mounting Hardware: The shot counter head is secured by four bolts with lock washers.
-
Remove the front two bolts first.
- Have a helper hold the front of the shot counter head to relieve pressure as you remove the two rear bolts.
-
-
Remove the stopper nut and bolt located directly to the left of the Setup Steps sticker.
-
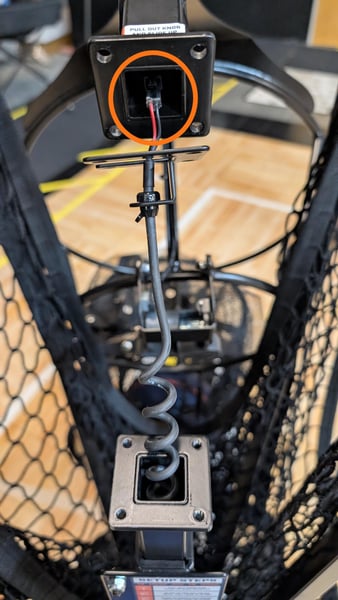
Retrieve Cable Guide and Disconnect Cable: Once the bolts are removed, disconnect the cable then the head is free to move.
-
Carefully disconnect the cable where it connects to the shot counter head.
-
Warning: DO NOT drop the cable inside the net support beam.
-
Be sure to keep the small flat piece (cable guide) that holds the cable and prevents it from falling inside the support beam.
-
Part 3: Replacing the Slider and Reassembly
-
Remove the Old Slider: Pull the pin out, and slide the old net slider up and off the top of the net support beam.
-
Install the New Slider: Pull the pin on the new slider and slide it down onto the net support beam.
-
Reinstall the Shot Counter Head:
- Have your helper hold the front of the shot counter head in place.
-
Reconnect the shot counter cable to the head.
- Secure it by replacing the four bolts and lock washers.
-
Replace the Stopper: Put the stopper nut and bolt back into the top left hole on the net support beam.
-
Reattach the Net Poles: Place the net poles back into their slots, ensuring they are properly aligned, and secure them with the nuts, bolts, and washers.