Setting Up Your New Dr. Dish All-Star+
Welcome to the Dr. Dish Fam! Get up and shooting with these simple steps.

STEP 1
Download the Dr. Dish Player App & Create Your Account
Download the Dr. Dish Player app
- Sign Up by entering your name, email address, and personal pin. This account will allow you to log in to your Dr. Dish machine.
- The Player app will allow you to view all your stats and percentages
- To manage or create a team, create leaderboards, and build or assign custom drills that sync directly to your machine, be sure to utilize our online Training Management System: tms.drdishbasketball.com
STEP 2
Unboxing Your Dr. Dish Machine
- Cut band and lift box off of pallet and machine
- Cut off all white zip ties (do NOT cut any black zip ties)
- Remove all accessories from the back of the machine
- Remove protective plastic wrap from the entire machine
STEP 3
Assemble The Ball Feeder & Distance Adjuster
- Cut white zip ties off the Ball Feeder
- Remove cardboard spacer lowering Ball Feeder
- Install Ball Feeder by inserting 2 M8 Bolts & Washers
- Attach the Ball Distance Knob by twisting until tight, and move the Distance Lever to position 2
- Install the Ball Distance Plate using 4 M6 Screws & Washers
STEP 4
Remove Your Machine From the Pallet
- We recommend two adults remove the machine from the pallet
*The Dr. Dish weighs 296 lbs/134.3 kilos with all four wheels attached - Move the machine so the back wheels are off the pallet and resting on the ground
- Grab the front of the machine, twist it to the side and set the front of the machine on the ground
STEP 5
Assemble The Shot Counter
- Route the power cord from the shot counter basket through the shot counter handle until it comes out of the oval opening
- Insert Shot counter Head into Shot Counter Handle
- Using the 8 mm Allen Wrench & 17 mm Open Wrench included, bolt together the Shot Counter Basket and Shot Counter Handle
STEP 6
Setting Up Your Dr. Dish
When you're ready to start shooting, with the machine away from the basket:
- Rotate the base of the Machine until at a 45-degree angle
- Extend all 4 netting poles until snapped into place, ensuring the net is not caught in frame
- Pull the netting handle outward and down to raise the net
- Once the handle is fully snapped into place, flip down the yellow safety latch to lock the net in position
- Insert the Shot Counter securely on the back frame of the Dr. Dish and tighten the knob and connect the power cord
- Wheel the machine directly under the basket until the rear poles are even with the backboard
- Once in place, lock the wheels of the machine
STEP 7
Power On & Connect to WiFi
Using a type W 120V extension cord, plug the machine in.
- Turn the main power switch on the back of the machine on
- Once the machine has powered on, click ‘Start Shooting’.
- On the left side, select the WiFi logo to connect to your Network
STEP 8
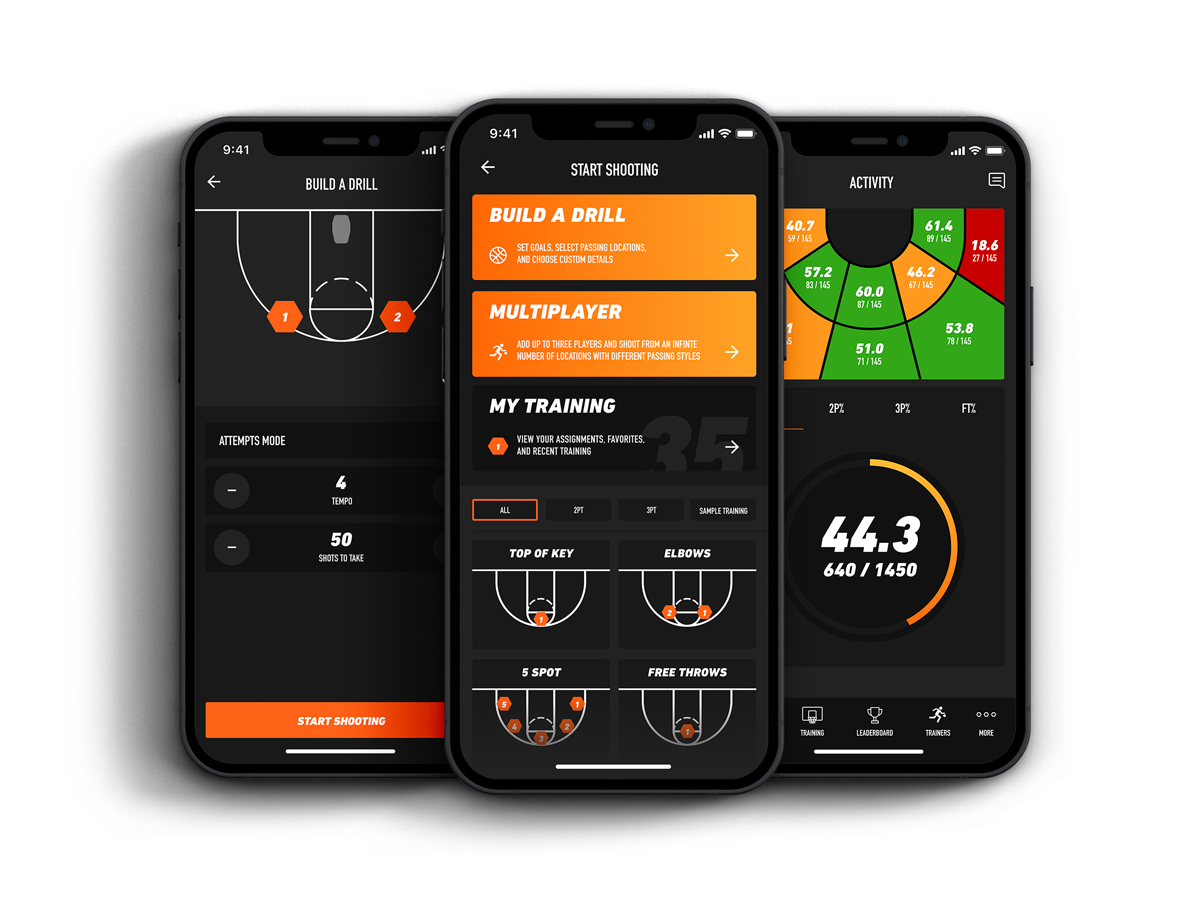
Getting to Know Your Dr. Dish
The Home Screen displays multiple ways you can use the machine to get started shooting. Check out some of our favorite features below:
- Build a Drill - Completely Customize your training by choosing shot locations, drill modes, & attributes to fit your training needs
- My Training - View all your favorite drills, as well as customized drills
- Browse Training - View all the latest drills and workouts from some of the best NBA trainers
Need More Help?
Online Support
Get help for all of your support questions 24/7